Supported Payment Methods
Looking to get started with One-Click or “Payer Aware Menu” to reduce friction? These are the supported payment methods:
- Cards: Masked PAN, Expiration Date and CVC
- Swish: MSIDSN – Only for e-commerce flow
- Vipps: MSIDSN
- Invoice: Email and MSIDSN
- Trustly: Preferred bank account
Introduction
There are two ways to get started with contributing to decreased friction for your customers during the checkout experience: “Payer Aware Menu” and “One Click.” They are not mutually exclusive and can be used in conjunction to fully maximize capabilities. However, our recommendation is to implement “Payer Aware Menu” as the default for a smoother handling.
With “Payer Aware Menu”, we will assist you with sorting and displaying the
information to your customer. We can do this by creating a profile under the
designated reference you have given us inside the payerReference field. For
“One-Click”, you will sort the information on your end and present their details
inside our interface. It is most suitable for scenarios where you have the need
to force a set of details to be used, or when you have built your own menu
displaying payment methods.
You can read more about the basic implementation of a payment order in our Get Started section. The API calls needed for this use case are available and ready to use in our collection of Online Payment APIs. You can use the collection with your own test account or with the generic test merchant.
Payer Aware Menu
To enable storing details for future purchases using the Payer Aware Menu, follow these steps:
- Parameter
generatePaymentToken:
- Set to
trueinside the payment order request. - This value remains
trueby default for all transactions unless you wish to force “Guest mode”; in that case, sendfalse.
- Payer Object:
- Include the parameter
payerReference. Assign a unique value that can be sent with every future transaction. Failure to send in the same reference may result in wrong details being displayed or defaulting to creating a new profile.
- Optional Enhancements:
- Expand the
Payerobject with additional information such as first and last name, phone number and email address. This data will pre-populate relevant fields, providing a seamless experience for customers.
For more detailed information and examples, refer to the Payer Aware Payment Menu documentation.
One-Click
To get started with One-Click payments, follow these steps:
- Parameter
generatePaymentToken:
- Set to
trueinside the payment order request for initial storing of details.
- For Future Transactions:
- Modify the
generatePaymentTokenparameter intopaymentTokeninstead and replace the valuetruewith the GUID (tokenized reference of the card) value.
- Optional Enhancements:
- Just like with “Payer Aware Menu”, you can enhance the payment experience by
submitting relevant fields in the
Payerobject to pre-populate relevant fields.
For more detailed information and examples, refer to the One Click Payments documentation.
Example Request Structures
The examples are abbreviated where needed.
Payer Aware Menu and One-Click (for generating details)
Payer Aware Menu and One-Click (for generating details)
1
2
3
4
5
6
7
8
9
10
11
12
13
14
15
16
17
18
19
20

{
   "paymentorder": {
   "operation": "Purchase",
   // ... other details
   "generatePaymentToken": "true",
   "urls": {
   // ... other URLs
   },
   "payeeInfo": {
   // ... payee information
   },
   "payer": {
   "firstName": "Leia",
   "lastName": "Ahlström",
   "email": "leia@swedbankpay.com",
   "msisdn": "+46787654321",
   "payerReference": "AB1234"
   }
  }
}
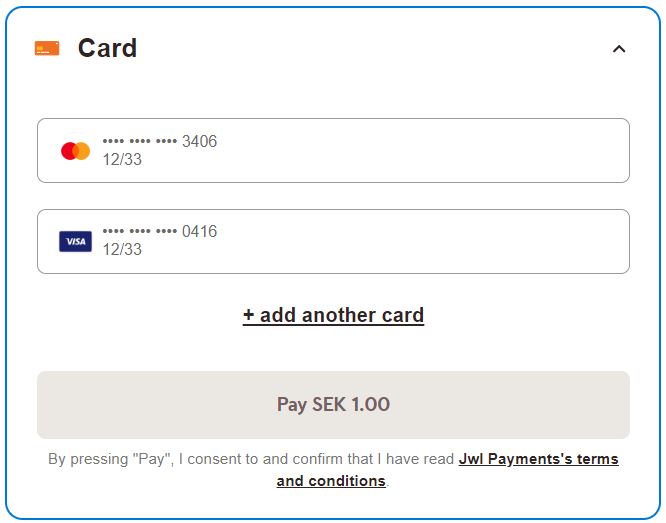
Here is an example image of what the menu looks like with two previously stored cards. «Insert Image PAM1»
One-Click for Future Transactions
One-Click for Future Transactions
1
2
3
4
5
6
7
8
9
10
11
12
13
14

{
   "paymentorder": {
   "operation": "Purchase",
   // ... other details
   "paymentToken": "b4739476-343e-4d2c-2e14-08dbec1e555a",
   "payer": {
   "firstName": "Leia",
   "lastName": "Ahlström",
   "email": "leia@swedbankpay.com",
   "msisdn": "+46787654321",
   "payerReference": "AB1234"
   }
  }
}
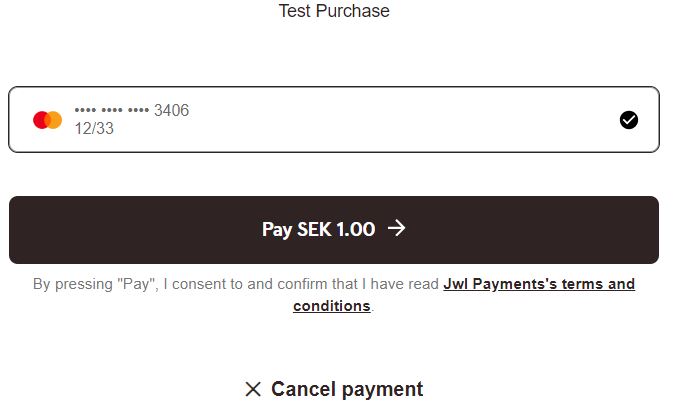
Here is an example image of what it would look like when forcibly loading a specific set of details with “OneClick”. Insert «OC1»
By following these steps and structures, you can seamlessly integrate our features “Payer Aware Menu” and “One-Click” to reduce friction and enhance the overall payment experience for your customers.
Removal of Payment Method Details
When certain conditions arise, such as encountering specific error codes or receiving requests from the payer to remove their details, it becomes necessary to initiate the deletion of associated tokens. Here are two methods:
- Deletion of all Tokens:
Send a
PATCHcall to the base URL with the endpoint/psp/paymentorders/payerOwnedTokens/<payerReference>.
This operation is only available for “Payer Aware Menu”.
- Deletion of a singular Token:
Use the URL
/psp/paymentorders/paymenttokens/<TokenValue>.
Both scenarios generate the same response:
Token Deletion Response
1
2
3
4

{
"state": "Deleted",
"comment": "Comment on why the deletion is happening"
}
Common causes that triggers the need for deletion
- Your customer requests their information to be removed.
- Your agreement with your customer has been terminated or expired.
- Error codes pertaining to permanent causes. Example of these can be
Card Expired (54)orCard stolen (43)